If you encounter this warning in the plugin window, you will need to renew or upgrade your certificate in order to continue uninterrupted SSO between your WordPress site and your IDP.

Pre-requisites:
- The latest version of the WordPress SAML SSO Plugin with the latest certificates.[How to get the latest version of the plugin?]
- Enable Sign SSO & SLO Requests option under the Service Provider Setup tab in the plugin.[What does sign SSO and SLO requests mean?]
Note:
- If you are not using the sign SSO and SLO Requests option, and if your IDP is not sending encrypted assertions, then you can simply follow the steps from step 10
- If you are using the sign SSO and SLO Requests option, and if your IDP is sending encrypted assertions,
i.e In KeyCloak if the Encrypt Assertions and Client Signature Required fields are ON.

Then you can simply follow the steps below to upgrade the certificate:
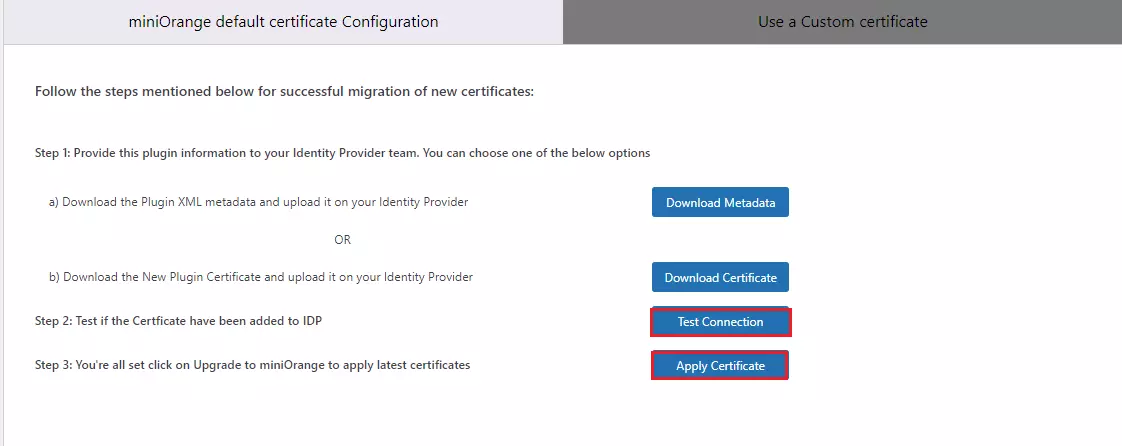
- Navigate to the Manage Certificate tab in the plugin.
- Click on the Download Certificate button to download the new plugin certificate and keep it handy as you will need it further.
- Navigate to the KeyCloak Admin console.
- Proceed to the Client section in the left pane, inside that select your Keycloak application created for WordPress.
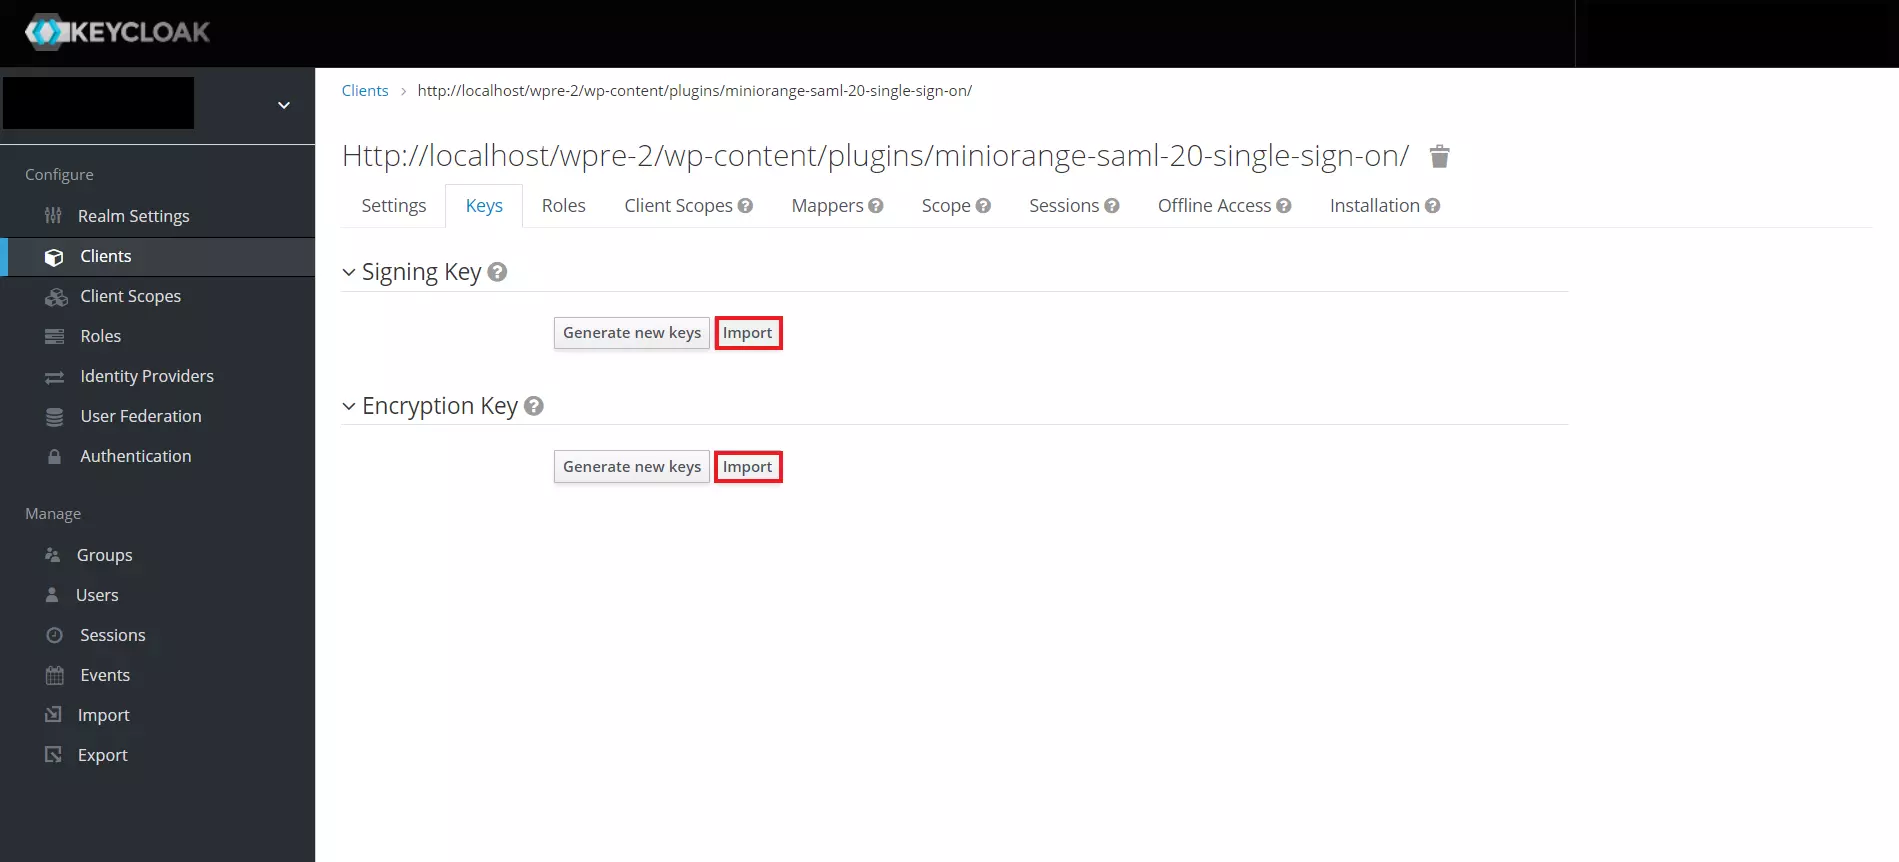
- Under the Keys tab, you will have to upload the certificate for Signing Key as well as certificate for Encryption Key.
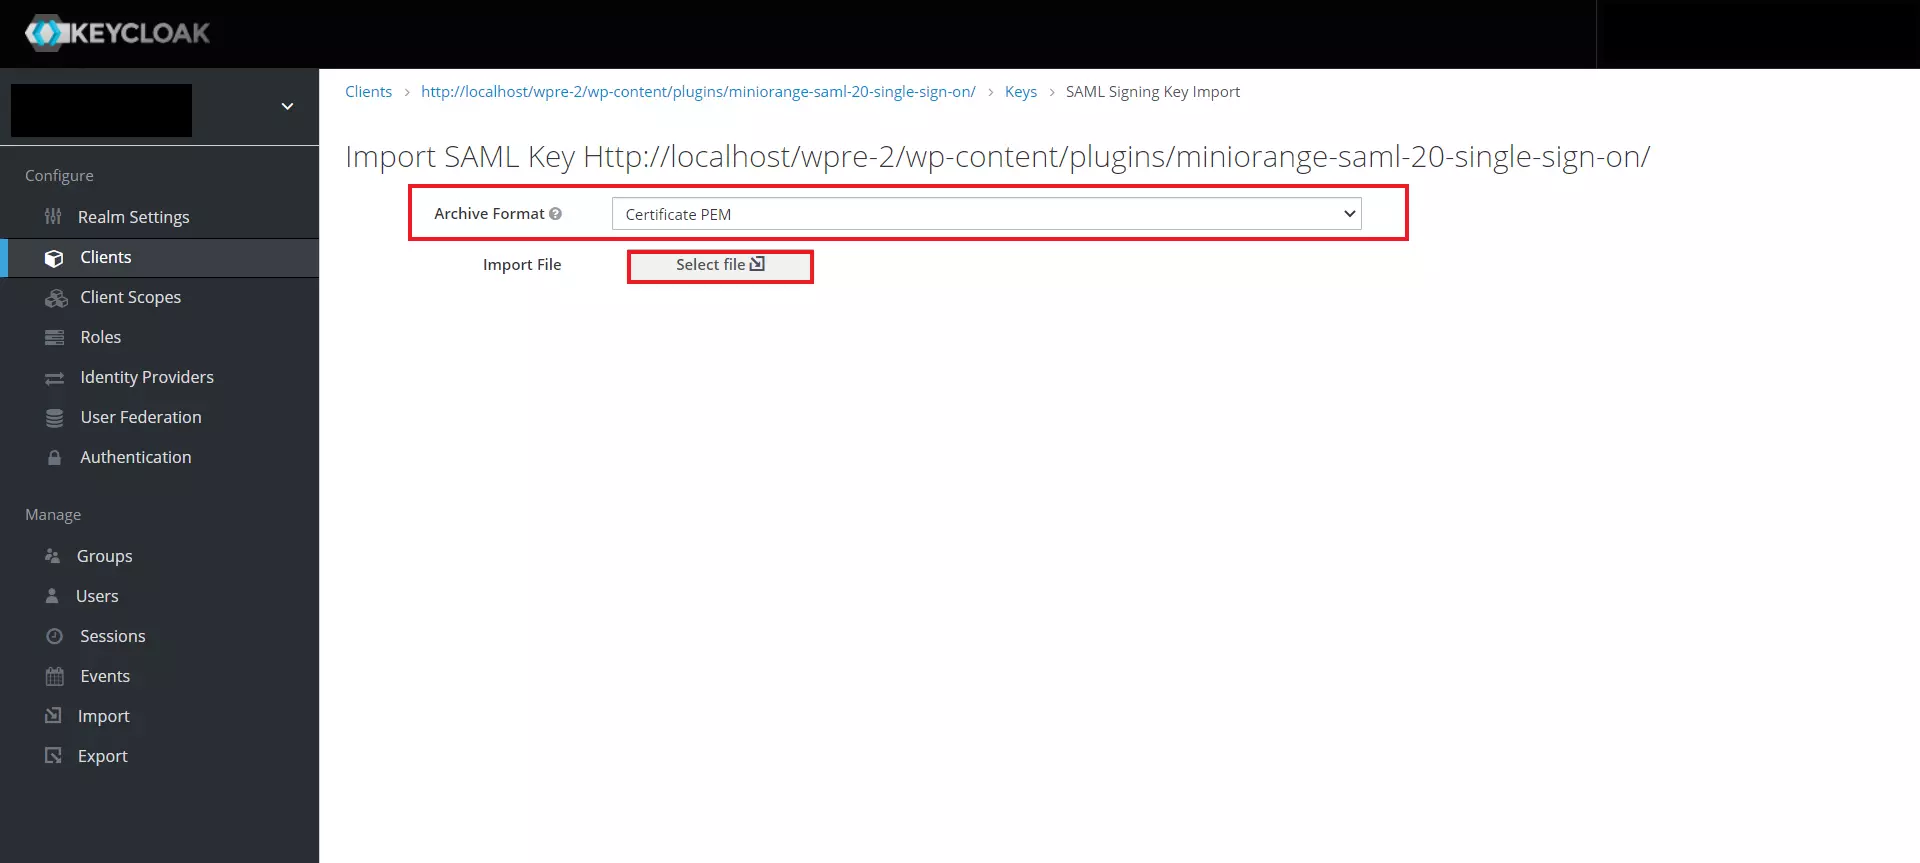
- Click on Import, you will be presented with a screen to Import SAML Key.
- In the Achieve Format dropdown, select Certificate PEM option.
- Select the certificate file and import the certificate.
- Now import the certificate for the Encryption key following the same steps.
- Navigate back to the plugin and in the Manage Certificate tab, click on the Test Connection button.
- If your Test Connection is successful, click on the Apply Certificate button to apply the latest certificate in the plugin.
- You will be prompted with the dialog box of Are you sure you want to upgrade? Click on the Confirm Upgrade button.
- You have successfully upgraded the certificate.


If you are still facing any issues then feel free to reach us at samlsupport@xecurify.com.